Are you feeling hungry but don't want a huge meal? Maybe you're having a weekend lunch with a friend and want to impress them with something beautiful yet simplistic. A simple avocado and grapefruit salad is an excellent choice, especially in winter when grapefruits are abundant in the absence of many local vegetables. This recipe is also perfect when prepared as an appetizer course for a wine dinner. I chose to pair it with a bright and crisp Sauvignon Blanc (Clifford Bay 2012) which echoed the citrus flavors in the salad. It takes a little prep to make the salad but you can do it all ahead of time for easy assembly when you're ready to eat. This recipe comes from Emeril Lagasse but I changed a couple things to make it more my own. I hope you enjoy.
Avocado and Grapefruit Salad
Ingredients:
3 pink grapefruits
1 package of mixed greens or arugula
2 avocados (make sure they are ripe)
Vinaigrette:
2 1/2 teaspoons lemon juice
1 tablespoon plus 1 teaspoon rice vinegar or champagne vinegar
1 tablespoon lime juice
1 tablespoon grapefruit juice
2 tablespoons honey
2 teaspoons dijon mustard
2 teaspoons minced shallots
1/4 cup sunflower oil or other mild salad oil
For the vinaigrette: Combine all the ingredients together in a bowl and whisk well. Add a pinch of salt if desired. Set aside. Wash the greens and set aside. Peel the grapefruits using a sharp knife. Cut between the white pith to remove the segments of fruit. Remove any seeds from the segments and set the segments aside in a bowl. Meanwhile, cut the avocado in half and remove the pit. Cut the halves into wedges and remove the skin. Set the wedges aside.
To assemble the salad place a handful of greens on a salad plate. Decorate the greens with avocado slices and grapefruit segments. Dress lightly with the vinaigrette and some fresh cracked pepper if desired. Serve with a glass of wine.
Wine suggestion: Clifford Bay 2012 Sauvignon Blanc
from Marlborough, New Zealand
Reason for this wine: The wine is fruit forward and aromatic much like the salad itself. The flavor of the wine is ripe with citrus fruit, kiwi, lime zest and a grassy peppery finish. It is a bright and refreshing wine to complement a bright and refreshing salad.
Monday, November 4, 2013
Sunday, March 17, 2013
Turning Japanese
I apologize for the long break, I've just
returned from a two month stint in Japan heading up an office re-opening for my
company. I know Dave isn't as fun to read as I am so I can imagine our 5
faithful readers have been missing me tremendously. I'm home for the next
couple of weeks before I'm back on a plane headed once again to Tokyo for
another couple of months. I needed to catch up on some western foods and
blogging!
I'm full on Cheddar Ale soup and Guinness
chicken wings (see our previous post) that Dave was kind enough to make for me
on this St. Patrick's Day. We're listening to some Celtic music and
drinking a Cab/Shiraz blend from Australia (eh, Ireland's not exactly known for
their contributions to the world of wine).
So, Japan. You're probably just dying
to know what I ate and drank. Sake is what comes to everyone's mind when
talking about Japan and drinking and rightfully so, it is indeed everywhere in
Japan. What WAS surprising, however, was the many different types. I
had no idea! This was all good stuff for me as my wine studies will
eventually incorporate a section on sake, so although I'm not at home to take
my course I figure it's just as good I attend the school of life as a means to
learn it.
The food in Japan was surprising as well.
Not that it wasn't good, Japan and specifically Tokyo are known for their
culinary offerings. It was surprising the different types of Japanese
cuisine that there is. I was thinking of the basics when I first arrived
there...sushi, rice and noodles (not the Ramen I had in college but the good
stuff). But au contraire mon frere! (I don't know how to say that
in Japanese). There was yakitori and shabu shabu and okonomiyaki and oh
my!
Fish and vegetables are prominent in Japanese
cuisine. Every week, six days a week there is a fish market with an
auction that all restaurant chefs, sushi chefs, etc. attend in order to stock
up for the day. It starts at 5 a.m. and you can sample the raw fish
right there. Needless the say the fish is fresh and plentiful anywhere
you go in Japan. I'm a big fan of sashimi so this was one of my favorite
things about being there. Sometimes it's a little different or unexpected
(check out the little guy in my miso soup in one of the pics below) but I'm
okay with that. As a matter of fact most of the Japanese restaurants
didn't have an English version in house so I often just let the chef know to
make up whatever he thought I should try. I had grilled fish (usually
white), Japanese beef steak, pickled vegetables (pickles and fermented
vegetables in general are big there), cabbage salad and kimchi, gobo (root
vegetable that they slice and fry like french fries) and also some parts of a
pig or cow that you don't see every day in America. There's a lot of
different styles of eating too, and I loved the Japanese or Korean BBQ where
you were brought out the raw meats and cooked them yourself on a grill at your
table.
I could write a book on the cuisine...and in
the event not everyone has the means to get themselves there I've included
below a little link that will help you seek out any type of Japanese food you
want to learn more about.
Onto the sake! I had had some tasting experience with sake prior to arriving in Tokyo but obviously being there and tasting what's made in the town you're in or not far from is a bit of a game changer. As I mentioned, there are several different types and like wine governance in any other country what is what in the world of sake is heavily regulated by the Japanese government. All sake is made from white rice and the differences in types are much like differences in wine...the fermentation process, how long or how it's aged and even whether or not it's been pasteurized. Often times it's served in a tall shot glass that's placed inside of a small wooden box, so the overflow from the glass is your second serving that you pour out of the corner.
My personal favorites were Junmaishu because
it's both smooth and mellow. I liked this hot and cold. Genshu is a type
of sake that's higher in alcohol content because it's not diluted with added
water, so hold onto your shorts for that one. The good news there? Most
sakes lack the addition of sulfites, and hence the hangover the next day.
Now, that's not to say the next sushi restaurant you walk into you should
order a bottle and cry "banzai" while downing it (which would be
appropriate as it's a Japanese war cry). But it was nice to have some
sake with dinner and not wake up with that cloudy head feeling you get from
other libations.
I've refrained from adding every picture I
have in here and tried to keep it food specific. If you have the chance
to go, do it, it's a beautiful city with a ton to do and see. I'll be
back there for Japan's infamous cherry blossom season so I'm looking forward to
doing and seeing more.
Sayonara for now,
Trish
Saint Patrick's day is here, and so is Tricia!
Hey everybody! (Dave here). First things first, let's give a shout out to Tricia, who has graced us (albeit briefly) with her presence. She has been living in Japan for quite some time and it's great to have her back. I haven't seen her in a while and today is the first time in months. Today is also Saint Patrick's day. Tricia and I both felt we should show our respect to Ireland (on what is the most low key Saint Patrick's day ever........thankfully) by cooking with Guinness.
Lately I have been eating toast and eggs, but Tricia has been chowing down on bizarre bento boxes, sashimi and sake. I wanted something warming as it is still cold here in Rhode Island. Also, Tricia hasn't seen an oven in a while because in Tokyo they aren't as common. I thought roasted chicken wings were just the American treat she needed, but being Saint Patrick's day we had to feature something Irish.
We decided to keep things simple, some crusty bread, cheddar and beer soup with bacon on top (I got lazy and bought that at Whole Foods) and some delicious homemade Guinness chicken wings. I'm not quite sure how Irish any of these foods are and in fact, they probably aren't. But when you don't really know Irish food very well, I say, just pour in some Guinness!
These wings are a great appetizer at any party, not just Saint Patrick's day. The beer gives the wings a deep warming flavor and the added carrots and parsnips add an earthy sweetness. We recommend having these along side other nibbles like an Irish cheese plate (or informally with store bought soup) when entertaining. Here's what I came up with:
Guinness Braised and Roasted Chicken Wings
2 lbs chicken wings
1 small onion chopped fine
1 scallion sliced
3 cloves garlic minced
1or 2 carrots
1 parsnip
1 can (15 oz.) Guinness
2 tblsp butter
salt and pepper
thyme (1 sprig fresh or 1 tsp dried)
1 tsp sugar
scallion for garnish or fresh parsley
Salt and pepper the chicken wings and brown them in a large pot with the butter. Remove and set aside. Add the parsnip and carrot (cut into a few chunks) into the pot. Add the onion, scallion and garlic, stirring until fragrant. Add the chicken wings back to the pot and add 3/4 of the can of Guinness. Drink the rest for good luck. Add the thyme and bring to a boil, then cover and simmer for 20 minutes on low heat. Remove the chicken wings to a baking sheet. Add the sugar to the sauce and cook uncovered on high heat for a few minutes or until thick. Remove the vegetables and thyme sprig if using fresh. Pour over the chicken wings and toss to coat. Broil the wings in the oven for a few minutes on each side until crispy. Garnish with parsely or green onions. Enjoy with Irish whiskey or a big pint of you guessed it, Guinness.
So my friends, I wish you all a fantastical day of eating and drinking. As we exit winter and enter spring, be prepared for many more magical feasts!
"St. Patrick's Day is an enchanted time, a day to begin transforming winter's dreams into summer's magic."
Adrienne Cook
Tuesday, February 19, 2013
Its Cold Out! Warm up with a Spicy Sweet Potato and Poblano Stew
I was trying to create a recipe that would be hearty, healthy and warm on a cold night. I had a lot of vegetables in the fridge so I decided to conceptualize a vegetarian stew that packed a bit of heat with some sweetness. I wanted bold flavors that warmed the soul but left the diner without wanting of meat or dairy. I thought about flavor combinations. Spicy poblanos, sweet potatoes and earthy undertones of cilantro all backed with a hearty dose of chickpeas. It was an experiment that actually worked. Here's what I did:
Ingredients:
2 poblano peppers
1 small bunch cilantro chopped.
2 cloves garlic
1 bunch scallions
1 can whole plum tomatoes (get the best quality you can find)
1 can chickpeas, drained
1/2 cup red wine
Brown rice to serve with the dish
Salt and pepper to taste
Preheat the oven to 400 degrees. Rub the whole poblanos with olive oil and sprinkle with salt. Place the poblanos in the oven for about 20 minutes or until soft and tender. They will color a bit which is fine.
While the peppers cool a bit, drizzle some olive oil into a dutch oven and sautee the scallions and garlic over medium heat.
After a couple of minutes pour in the wine. It will be very bubbly and steamy.
Cook and stir for about a minute, then add the can of plum tomatoes with all the juice. Use kitchen shears to cut the tomatoes into large chunks.
At this point the poblanos will be cool enough to handle. Cut the tops off and slice them down the middle. Remove the seeds and chop the poblanos into large chunks. Add the poblanos, sweet potatoes, cilantro, salt and pepper to taste. Remember, less salt is best to begin with. You can add more later, but you can't take it out. You can adjust the cilantro if you wish. It is a strong flavor that I love, but you can add less if you find it too strong.
Allow this concoction to stew on medium low heat until the sweet potatoes are tender and delicious. Season with more salt if needed at this time. Add the chickpeas last and warm through. Serve over brown rice and what you get should look exactly like the dish on the top of this page. This is both a healthy and hearty meal that will certainly warm you up.
Now of course, as you all know, we need something to drink with this meal. I tried a few things and found that you need a bold wine that holds up well to acidic, sweet, spicy food. The sweetness of the sweet potatoes, the spiciness of the peppers and the acidity of the tomatoes, in a strange way, echoed the flavor combinations of barbeque. Knowing that barbeque and red Zinfandel go well together, I decided to give it a shot, and it worked out nicely. Here are some great Zinfandels to try with this meal:
St. Francis "Old Vines" Zinfandel Sonoma 2008 ($17) Flavors of chocolate and cherry with smoky undertones make this a great full bodied choice to try with this stew
2005 Kenwood Sonoma County Zinfandel ($14) This is a great Zinfandel blended with a small amount of Barbera which gives it an added kick.
2010 Turley Old Vines Zinfandel: 90 points Wine Spectator
This may be one of the best Zinfandels I have ever had (albeit expensive). This is a special occasion wine but well worth the splurge if you can find it. It usually ranges between 40 and 60 dollars a bottle.
Sunday, December 23, 2012
I'm Dreaming Of A White Christmas

2011 Fontana Candida Pinot Grigio $12
From Northeast Italy, this variety has fruity flowery notes and is a crisp delicate wine. This is the perfect wine to serve at the beginning of Christmas dinner or any festive occasion. Great with appetizers, shrimp, crostinis or whatever festive treats you have. This fine example is sure to please the pinot loving crowd.
2010 Puiatti Zuccole Pinot Grigio, Italy, $13
Read more here: http://www.islandpacket.com/2011/10/19/1832597/the-perfect-complement-2010-puiatti.html#storylink=cpy
This Pinot Grigio from the Friuli Venezia Giulia region of Italy is a unique full bodied Pinot Grigio that Tricia and I used to serve all the time at Bacaro. I've had customers tell me "I don't like Pinot Grigio but I like this". That's probably because it has a bit more body to it and can stand up to a heavier meal. While the first wine mentioned is a fabulous starter wine, I would say this one would be perfect with the main course as well. Remember with wine, there are suggestions but no rules......just fun.

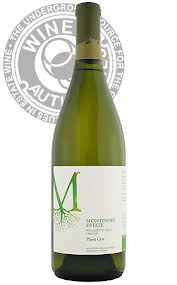
2010 Montinore Estate Pinot Gris, Willamette Valley, Oregon $12
You may or may not know that Pinot Gris is the same grape as Pinot Grigio, just with a different pronunciation. This Pinot Gris is fruity with tropical notes and flavors of melon, apple, and lime zest. It has a fruity yet crisp finish, displaying characteristics atypical to the usual Pinot Grigio. This wine is one of my favorites and it goes well with just about everything. I love it with prosciutto and melon or cheese with spicy mango chutney. Try it with all your Christmas appetizer delights. Goes very well with seafood also.
From Dave and Tricia, have a very happy Holiday season. Cheers!
I live just a couple of hours from where I grew up, but going home for the holidays always seems like such an event to me. I don't get home as often as I should, and because it's Christmas and my brother comes home from Arizona I get especially excited to do it every year.
There's a few things that are representative of being home for me, the constants that I count on every year. On my drive through town I will inevitably see someone I went to high school with hanging off the outside deck at the Whip City Brew, one of the local "establishments". My mother will automatically take whatever laundry I walked in with and throw it immediately into the washing machine. Don't get me wrong, it's great to still have Mom do your laundry but sometimes there's things that need to be separated or washed on a certain cycle but nope, Mom will throw it all in together before I've even taken my shoes off in the house.
And then there's Cavit Pinot Grigio, the big bottle. You all know it, you've all seen it. It's the epitome of jug juice in my opinion and despite countless attempts on my part to educate my dear family on the less expensive Pinots out there that do not taste like they were made in a bathtub, the Cavit bottle is ever present in my house at Christmas.
While it may be too late to save my own mother, I can at least attempt an effort to save our 5 faithful readers. Being that Pinot Grigio is such a popular white wine order, check out the below for an upgrade in quality without much of an upgrade in price.

2011 Fontana Candida Pinot Grigio $12
From Northeast Italy, this variety has fruity flowery notes and is a crisp delicate wine. This is the perfect wine to serve at the beginning of Christmas dinner or any festive occasion. Great with appetizers, shrimp, crostinis or whatever festive treats you have. This fine example is sure to please the pinot loving crowd.
2010 Puiatti Zuccole Pinot Grigio, Italy, $13
Read more here: http://www.islandpacket.com/2011/10/19/1832597/the-perfect-complement-2010-puiatti.html#storylink=cpy
This Pinot Grigio from the Friuli Venezia Giulia region of Italy is a unique full bodied Pinot Grigio that Tricia and I used to serve all the time at Bacaro. I've had customers tell me "I don't like Pinot Grigio but I like this". That's probably because it has a bit more body to it and can stand up to a heavier meal. While the first wine mentioned is a fabulous starter wine, I would say this one would be perfect with the main course as well. Remember with wine, there are suggestions but no rules......just fun.

2010 Montinore Estate Pinot Gris, Willamette Valley, Oregon $12
You may or may not know that Pinot Gris is the same grape as Pinot Grigio, just with a different pronunciation. This Pinot Gris is fruity with tropical notes and flavors of melon, apple, and lime zest. It has a fruity yet crisp finish, displaying characteristics atypical to the usual Pinot Grigio. This wine is one of my favorites and it goes well with just about everything. I love it with prosciutto and melon or cheese with spicy mango chutney. Try it with all your Christmas appetizer delights. Goes very well with seafood also.
From Dave and Tricia, have a very happy Holiday season. Cheers!
Monday, December 10, 2012
Merry Christmas Cocktail
It's the most wonderful time of the year! I absolutely love Christmas and everything that comes with it, I always have. I have the best memories of my childhood and Christmas was always special in my house. I'm very blessed to have the parents that I do and the means they worked so hard to provide us with when I was growing up (I know, I know...it's a little sentimental but I can't help myself).
One of my favorite decorations that was always present in our house was the yule log that my father made with his own hands. Every year when we put it out we would light the candles and become entranced with the dancing light. This year Dad made me my very own yule log and I had it proudly displayed when I had a couple of friends over for dinner the other night.
I came up with a simple and delicious cocktail (cucumber vodka and soda water with a dash of simple syrup and St. Germaine) that I was serving on the rocks for when they arrived and thought it would be fun to decorate the drink in the colors of the season. I "juiced" some pieces of cucumber in empty ice cube trays and added a cranberry before topping with water (see picture). That way you had a little red and green to toast with and it added a nice pop of color to the otherwise clear cocktail.
You could also skewer different fruits, vegetables or herbs onto cocktail swords if you wanted a festive presentation.
Sorry to my Jewish friends, I'll work on a silver and blue cocktail creation for next year!
Cheers!
Trish
Sunday, November 25, 2012
Still Struggling with leftover turkey? Not anymore!
Thanksgiving is over, but if you made a turkey this year, chances are its still in your fridge. If the idea of another turkey sandwich is painful to you but you don't want to throw the turkey away, I've got some good ideas. The first thing you should do is take all the meat off the bone and slice it into bite size pieces that can be made into anything. Turkey salad and soup are good options. To make the soup, just put what's left of your turkey in a big pot with carrots, onions, celery and any herbs you might have on hand. Let this cook on low low heat for several hours or overnight and then strain the liquid in the morning. If you chill it in the fridge with a piece of cheesecloth submerged just under the surface of the liquid, then the fat will rise and bind with the cheesecloth. Just simply remove it and you have grease free turkey broth! It helps to use clothespins to hold the cheesecloth in place. From here, you can add whatever you want to the broth to make a soup. Soups freeze well and will make an excellent quick meal on a night when you don't feel like cooking.
Another idea is turkey salad. Instead of the usual mayonaise and celery concoction we are all used to, jazz it up a little. I like to mix in red and green peppers or scallions, pesto and fresh herbs. Honey mustard with red grapes and almonds is also really good. Try mixing curry powder and mango chutney into the turkey salad for a spicy sweet rendition. Keeping it interesting will make you feel like it is a brand new meal and not leftovers.
The ideas mentioned above will work just fine, but I played around with something new this year. I decided to make a pasta out of the left over turkey, gravy and vegetables in the fridge. It was quick, easy and everyone at the table liked it. Its the type of recipe you can really make your own. I used the veggies I had in the house but certainly you could substitute whatever you like. Heres what I did:
Turkey and Vegetables with Egg noodles and Brandy Sauce
1 lb egg noodles
2 cups turkey meat, cubed (or however much you have on hand)
2 cups chopped cooked carrots(pieces of squash, mushrooms, or sweet potato would be great also)
1/2 a small onion chopped
11/2 cups leftover peas or frozen thawed peas
2 cups leftover gravy (see note)
1/2 cup brandy (if you don't have brandy or cognac, white wine will work. It will taste different, but still good).
11/2 cups chicken or turkey broth
parmesan cheese to taste
fresh parsley or any herb you have lying around.
Have a pot of boiling water ready for your pasta. Pour a bit of olive or vegetable oil in a sautee pan
and add the onion. Cook on medium heat for two minutes and then add the carrots. Add the brandy off the heat and then cook for another two minutes. Add the chicken broth and then the leftover gravy. Bring to a simmer and stir to mix well. Meanwhile, add your egg noodles and cook according to the directions on the bag. Usually its about seven minutes. Add the turkey pieces and the peas and warm through in the sauce. If the sauce seems to thick, just add more broth. You can make it as thick as you want by adding more gravy. Don't add salt until you've tasted the sauce, then season as you like. When the pasta is done, drain it and add it to your sauce. Top with parmesan cheese and parsley.
note: This recipe works best with homemade gravy. If you have store bought gravy, you can give it more flavor by simmering onions, herbs, carrots and celery in it for a few minutes. Thyme and rosemary are good herbs to choose. Sage and parsley work well also.
What to drink:
In the spirit of reusing whatever you have on hand, I would say, drink this with whatever's in the fridge. But if you want something new for the occassion I would suggest pinot noir as it pairs beautifully with turkey. Here are some suggestions for less than 25 dollars.
King Estate Pinot Noir from Oregon: Berries and subtle spices make their mark on this delicious example from Central Oregon.
Frédéric Magnien Bourgogne Pinot Noir: A great affordable burgundy pinot noir with floral aromas and flavors of earthy spice and red berry fruits.
Chateau St. Jean Pinot Noir: This pinot noir from California highlights the flavors of tart cherry, blackberry with a slight herbal/spicy quality. It is a wonderful bargain wine and pairs beautifully with many different foods.
Triple Layer Maple Walnut Cake.......what's not to like?
Hi everyone,
So almost every year I make a dessert to serve at Thanksgiving, but it is almost never the same dessert. This type of inconsistency has been a challenge for me over the years, but since I haven't found the "perfect" dessert yet, I have to keep on searching. I have had mixed results over the years but with mostly successful outcomes. The problem with baking is that you never really know whats going to come out of that oven! Also, you can't taste the product while its cooking like you can with sauce or soup. If it needed more sugar, thats too bad for you. The only way you'll know is when its too late to change it and everyone is biting into your sadly undersweetened bland block of cake. The key is to find a great recipe and stick to it. Luckily for all of you brave bakers, I have found that great recipe that this time, is sure to please a crowd.
Maple syrup is a seasonal ingredient this time of year and it lends itself well to baking. It has a creamy, caramel like flavor which is distinctive but mild all at the same time. Walnuts have always been a natural match with anything maple. Though its been done time and time again, I decided not to mess with the classics when I made a triple layer maple walnut cake.
This recipe comes from the book: Sky High: Irresistable Triple Layer Cakes
by Alisa Huntsman and Peter Wynne. I changed it very slightly by adding a touch of vanilla extract and reducing the cinnamon. I added a bit more cream cheese to the frosting, but other than those small touches the recipe remains true to it's original. I have to say, this was one of the least stressful cake making experiences I've ever had. If you follow the recipe and don't get too crazy with improvizations, you should end up with a big festive cake that everyone will enjoy. Who knows, maybe I'll actually make this one a repeat...... Heres how you do it:
Triple Layer Maple Walnut cake
Ingredients:
1 1/3 cups walnut halves
3 cups cake flour
1 1/4 cups packed light brown sugar
1 teaspoons ground cinnamon
1 3/4 teaspoons baking soda
3/4 teaspoon salt
1 1/2 sticks (6 ounces) unsalted butter, at room temperature
1 1/2 cups pure maple syrup, preferably light amber (see Baker's Note)
1 whole egg
1 egg yolk
1 cup milk
Maple Cream Frosting
Makes an 8-inch triple-layer cake; Serves 12 to 16
Maple Cream Frosting:
2 sticks (8 ounces) unsalted butter, at room
temperature 2/3 cup maple syrup
16 ounces cream cheese, at room temperature
6 cups confectioners' sugar, sifted after measuring
a dash of vanilla extract
Makes about 4 cups
1. Preheat the oven to 350 degrees F. Butter three 8-inch round cake pans.
Line the bottom of each with a round of parchment or waxed paper and butter the
paper. You can use the pan as a stencil and draw a circle around it with a pencil on a sheet of parchment. Just cut the parchment circle out and it will fit perfectly in the bottom of the cake pan. I use a pastry brush and a cup of melted butter to grease the pans. Grease them really well so the cake won't stick. I also like to dust them with a little cake flour after they have been greased.
2. Spread out the walnuts on a small baking sheet and toast in the oven until
fragrant and lightly toasted, 7 to 10 minutes. Transfer to a dish and let cool.
Leave the oven on. When the nuts are cool, set aside 1/3 cup for garnish. Finely
chop the remaining toasted walnuts.
3. Combine the chopped walnuts, flour, brown sugar, cinnamon,
baking soda, and salt in a large mixer bowl. With the mixer on low, blend well.
Add the butter and maple syrup and beat until blended. Raise the speed to medium
and beat until light and fluffy, about 2 minutes.
4. In a medium bowl, whisk together the whole egg, egg yolk, and milk. Add
this liquid to the batter in 2 or 3 additions, beating until blended and
scraping down the sides of the bowl well after each addition. Divide the batter
among the 3 prepared pans.
5. Bake for 32 to 35 minutes, or until a cake tester or wooden toothpick
inserted in the center comes out clean. Let the cakes cool in the pans for 10
minutes, then turn out onto wire racks, gently peel off the paper liners, and
let cool completely.
6. To assemble the cake, place one cake layer, flat side up, on a cake stand
or serving plate. Using a cake turn table works great because it spins and makes it easier to ice the cake. Spread 2/3 cup frosting over the layer, spreading it evenly
right to the edge. Repeat with the second layer and another 2/3 cup frosting.
Set the third layer on top and frost the top and sides with the remaining
frosting, swirling the frosting decoratively with an offset palette knife or the
back of a spoon. Garnish with the reserved toasted walnut halves.
Baker's Notes:
Be sure your walnuts are impeccably fresh. It will make all the difference in the world here.
Maple Cream Frosting:
1. Place the butter in a wide medium saucepan and melt over low heat. Add the maple syrup, raise the heat to medium-low, and boil for 5 minutes, stirring frequently so the syrup does not burn.
2. Pour the hot maple butter into a heatproof bowl and let cool to room temperature.
3. Place the cream cheese in a large mixing bowl and beat well with an electric mixer to lighten. Gradually add the confectioners' sugar and beat until smooth. Scrape down the bowl well and continue to beat until light and fluffy. Add the maple butter and vanilla extract and mix until completely blended.
You might be asking yourself: What to I drink with this cake? Don't worry, I wouldn't forget about the wine. For this cake, I would suggest a unique dessert wine from vermont called "Gold Leaf" made from (guess what?)......maple syrup. Here is a blurb all about Gold Leaf from the Boyden Valley Winery at boydenvalley.com
The classic taste of Vermont captured in wine For over half a century the Boyden family has honored Vermont’s spring tradition of maple sugaring. Now we are pioneering a new tradition: crafting that maple sugar into an amazing dessert wine, Gold Leaf. Barrel-aged for two years in Tonnelier French Oak barrels, Gold Leaf possesses great depth and complexity combining supreme estate maple syrup and locally grown apples. As an aperitif or after-dinner wine, it has an exquisite mouth feel and delicate yet pronounced maple flavor with overtones of vanilla, toasted nuts and coconut.
Be sure your walnuts are impeccably fresh. It will make all the difference in the world here.
Maple Cream Frosting:
1. Place the butter in a wide medium saucepan and melt over low heat. Add the maple syrup, raise the heat to medium-low, and boil for 5 minutes, stirring frequently so the syrup does not burn.
2. Pour the hot maple butter into a heatproof bowl and let cool to room temperature.
3. Place the cream cheese in a large mixing bowl and beat well with an electric mixer to lighten. Gradually add the confectioners' sugar and beat until smooth. Scrape down the bowl well and continue to beat until light and fluffy. Add the maple butter and vanilla extract and mix until completely blended.
You might be asking yourself: What to I drink with this cake? Don't worry, I wouldn't forget about the wine. For this cake, I would suggest a unique dessert wine from vermont called "Gold Leaf" made from (guess what?)......maple syrup. Here is a blurb all about Gold Leaf from the Boyden Valley Winery at boydenvalley.com
The classic taste of Vermont captured in wine For over half a century the Boyden family has honored Vermont’s spring tradition of maple sugaring. Now we are pioneering a new tradition: crafting that maple sugar into an amazing dessert wine, Gold Leaf. Barrel-aged for two years in Tonnelier French Oak barrels, Gold Leaf possesses great depth and complexity combining supreme estate maple syrup and locally grown apples. As an aperitif or after-dinner wine, it has an exquisite mouth feel and delicate yet pronounced maple flavor with overtones of vanilla, toasted nuts and coconut.Monday, November 19, 2012
Thanksgiving Hash
Happy Thanksgiving week to all! Dave and I will be on opposite ends of Massachusetts for the holiday with me home in Western Mass and he in Westport. He's tasked every year with bringing one of his dessert creations so we'll have to see what he decides to whip together this year.
I stick with a pretty traditional Thanksgiving menu myself. I've been doing my turkey the same way for years and it comes out excellent every time if I do say so myself (pretty sure I just did). A lot of flavor comes from what you stuff in the cavity of the bird, and I like to put citrus fruits and onion along with some rosemary, sage and thyme in there. Another dirty little secret? Just a few pieces of uncooked bacon if you have it on hand. Just trust me on that one.
So the leftovers...what to do, what to do. We all know the standbys--soups, sandwiches, pies and casseroles. I say put a brunch spin on it all and do yourself a solid with some turkey hash. This is absolutely delicious, so easy a turkey could make it (but probably wouldn't want to) and fun to do the next day or any day that weekend following. See our post on What To Drink With Brunch to wash it down with. These are all approximations that will serve at least 2, up to probably 4 or 5. You can adjust accordingly for a crowd.
1-2 cups leftover turkey, chopped
Leftover stuffing, just enough to bind the hash together (you made need to just separate this out some if it's all together from being refrigerated)
One sweet potato, chopped into small cubes
1/2 white or yellow onion
1/2-3/4 cup pancetta, chopped
Saute the sweet potato, onion and pancetta together until the sweet potato is fork tender, then add your chopped turkey and stuffing until it's all heated through. In another pan, have an over easy egg working. Once your hash is done plate it and then slide the egg on top.
Enjoy!
Trish
Tuesday, October 30, 2012
Pasta From Scratch, No Problemo!
When a good friend recently offered to have myself and my BFF, Jeanne, over
for a lesson in pasta making from scratch I was all too eagerly asking what time
and what I could bring. I've always wanted to have a go at making my own as
I've heard many tales of success and woe over the years from various people who
have dared walk the pasta from scratch plank before. When we arrived she had
all of the ingredients ready to go along with our pasta rollers and recipes for
us to take with us. We were going to be making traditional pasta as well as
cavatelli. I took pictures as we went and the recipes are below. Naturally,
sip a bottle of wine of your choice, the obvious being a good Italian red-- my
recommended three would be a Chianti, Montepulciano, or Valpolicella, as you go
for the complete experience.
The great surprise here? I actually found this easy to do...which may be
the case for folks across the globe but I was going in prepared for challenge
and I have to say the outcome was more like Tricia: 1, Pasta: 0. The hardest
and most tedious part for me was rolling the cavatelli. Apparently there's a
machine out there that does the shaping for you and I must say I will be putting
that on my 'things to buy' list shortly.
Let's start with the pasta. The ingredients here are simple, 2 cups of
flour, 2 eggs, 1/2 tsp of salt and 1/8 cup of oil (olive or vegetable is fine)
will get you a pound of pasta. Start with a large clean work surface and make
the flour and salt into a mound with a well in the middle. In that well you're
going to pour in your oil (just a little) and crack your eggs into it. Grab a
fork and start mixing the eggs, similar to how you would for scrambled eggs and
as you go work some of the flour in from the sides of the well. It's okay if
you see some egg start to run out the sides, just work the flour around it to
keep it contained (Jeanne struggled a bit here, thankfully no one was hurt).
Once you have the eggs and a good amount of the flour incorporated, drop the
fork and use your hands to knead and work the dough into a ball. Get aggressive
here, it takes a lot of beating up on this dough and it will feel dry but that's
normal (if still really dry after a lot of working add a little water, just a
splash).
Once you have it into a ball cover it with a bowl and let it rest for 30
minutes. If you're making cavatelli the same day, now would be a good time to
get started on that. Cavatelli is similar in texture to gnocchi, so it goes
best with a light marinara or similar as it's heavier than traditional pasta.
As I mentioned, rolling these little suckers out so that they curl the way
they're supposed to did not go well for me, so consider yourself warned.
You'll need one pound of full fat ricotta cheese, 1/3 cup milk, 1 egg, 1
tsp salt and 4 cups of flour. You're going to drop your ricotta onto your work
surface and then add the flour (start with 3 cups, you'll work the 4th cup in in
just a bit)...work that together and then form a mound with a well as you did
for the pasta. Drop your egg and milk into the middle and get to working it all
together (use the same aggression as above!).
You'll notice this is much more wet than the pasta dough, so work in that
4th cup of flour as needed. Once you have your dough incorporated and formed
into something that resembles a round shape, cut off pieces about the size of a
piece of biscotti, and then roll those pieces into a snake that's about the size
of a nickel in diameter. Use a butter knife to cut that snake into 1/2" long
pieces that will be your cavatelli. This is when you want to use your fingers
to flatten and roll that piece of dough until it curls onto itself, so that it
looks like the picture below (actually, as these are ours and it was our first
time your better reference might be to Google a pic...or just get that damn
machine!) The wine came in really handy here. Once you've formed all of your
dough, lay out the cavatelli on a flat surface to let them dry out some.
Now, back to the pasta! Uncover your ball and cut into pieces similar to
what you did to make your cavatelli. These pieces are going to be run through
your pasta roller, on the widest setting to start (different machines have
different settings, so be sure to read your manual here). Run it through once,
then fold it half and run it through again, then do that a third time. Now
you're ready to run it through on a smaller setting (depending on what kind of
pasta and how think you want it) just one time. As you run the dough through
and lay them onto your work surface flour them just a little on the tops.
Finally, run the pieces through a smaller setting (on my machine I started with
setting 8, then 6, then 4 for my last) one time.
I wanted fettuccine, so I used the wider cut on the machine, ran the pieces
through and voila! Fettuccine is made!
Another little neat trick that our friend taught us was that you can add
some basil leaves or parsley (in the event you're making pasta for some soup or
what have you) to a flat piece of the pasta dough, fold it in half and then run
it through a smaller setting and the herb is embedded right into the
pasta...pretty neat!
Lesson here? Well, there's a few. Most
important is that homemade pasta is easy and can be done in a couple of hours at
home. I froze mine as it will take me some time to go through a pound of pasta
(especially considering I'm supposed to watch my gluten intake...whoops) so feel
free to double or triple the recipe and do the same at home!
Bon appetito!
Trish
Saturday, October 27, 2012
A Trip To Sao Paulo!
I recently took a trip south of the equator for my first time when I visited our office in Sao Paulo, Brazil for a week. I know Brazil for a lot of people who haven't been conjures up thoughts of super hot temps with super hot people that are scantily clad milling about in cafes and on beaches. Nothing was further from the truth on that front. Brazil is in the early part of their spring now gearing up for summer so temps while at times hot were mostly in the low 70s and there were a few cloudy days that threatened rain and felt even cooler. It should also be noted that there was nary a thong in sight with everyone bundled up on those cooler days, albeit a little over the top in my opinion (I'm a New Englander, I'm not bundling up in 72 degree weather!).
I absolutely loved my week there and I'll tell you why. The city offers a ton in the way of night life...there's so much to do all the time and in a city of that size it's going on 24/7. Now, I was a far cry from dancing on tables until 5 in the morning on any night, but it was interesting to hear the tales of those that have (without having their hangover). Our office there is super nice and the people in it even more so, it really made the experience that much more enjoyable. One person in the office in particular, Gabriel, was a walking, talking food blog and I happened to set up shop for the week right next to him. Yep, once he got started asking me what I'd tried so far and what I should try throughout the week I knew I sat next to the cool kid in class (at least in my fictional food and drink classroom in my head). He told me how serious Brazilians take their food and what I absolutely had to try that week. Surprisingly sushi and Italian food are very popular and are done very well in an abundance of restaurants in Sao Paulo. There are certain days of the week devoted to certain foods...for instance, Thursday is lasagna day and Wednesday is reserved for Feijoada, a stew of rice and beans with beef or pork that is very traditional down there.
Brazilians have the most delicious little way to start the day in the form of pao de queijo, which means cheese bread and that's exactly what it is, formed into a round a little smaller than a tennis ball. Anytime you combine cheese with bread you have my attention and these just topped the charts of "delicious cheesy things" I've had in my life. Wherever you could buy pao de queijo you would also find in the next tray in the case coxinha, a traditional Brazilian snack that intrigued me from the get go due to it's cone shape. Of course, my walking food blog knew of the absolute best place in the area to have coxinha so we headed over for lunch one day and had one of each of the shredded chicken filling and shredded chicken with cream cheese filling. You can top them with ketchup or hot sauce, I chose the latter and dug in. I know you're all thinking that I must have gained ten pounds by this point in my trip and well...you're probably right. Luckily the scene I referenced in the first paragraph was not playing out according to popular belief.
There's a lot of great buffets in Sao Paulo, and while buffet for a lot of people means dried out, overcooked food that's been sitting under heat lamps for the last hour, such is not the case here. Whether you want traditional local foods, Italian or sushi there is a bevy of fresh, expansive buffets with everything your heart desires. I gave in to the sushi at the request of Gabriel one day and it was one of the best things that had ever happened to me. I felt quite literally like a kid in a candy store choosing amongst the options of tempura, dumplings, sushi, sashimi, salads and miso soup. Everything was so colorful and plump. What's great about any meal anywhere in Sao Paulo is that you can wash it all down with your choice of fresh squeezed juice. You can get fresh juice anywhere in the city in the form of orange, passion fruit, watermelon, pineapple...you name it. Brazil is a hub for great produce grown right there so you have access to what we would consider tropical and exotic fruits at every turn.
We wrapped up the week by attending a local street farmer's market that has vendors serving up pastel, another "must" on my list from Gabriel. This is where I almost didn't get on my plane coming home. Pastel according to Gabriel is the result of Brazil's failed attempt at making spring rolls. What actually came out of it is a rectangular shaped pastry that is filled with any number of items and fried in oil in just a few minutes while you wait. I chose the beef and cheese, Gabriel the heart of palm. You can also get shredded beef, seafood and pizza filling. Pastel goes perfect with the traditional Brazilian drink garapa, which is sugarcane juice that's often served with lime or pineapple. We had ours with lime and it was amazing--sweet but with the lime to cut it it was exactly what I wanted on a hot day. You grab a seat where you can amongst the farmers shouting out the great bargains on their wares and chow down. After we finished and strolled through the market, I stopped at a table of spices and seasonings and proceeded to buy the man out of his offerings, wondering the whole time if I was actually going to get this through customs but excited at the culinary creations that were dancing through my head as I selected spice after spice from his array.
I know you're probably thinking "where's the wine in this post?" and well...that was the one thing Brazil couldn't offer much of. Locally made I mean. Of course there's a fantastic wine selection at restaurants across the city, and certainly wines from Argentina and Chile are prominent, but Brazil while great at many things, isn't known for their wine production. Lucky for them the pao de queijo made up for it!
Until next time Sao Paulo!
Trish
Monday, October 15, 2012
What to Drink with Brunch
Here at Grapes With Dinner we are "brunch people". Okay, it could also be said that
we're breakfast, lunch, dinner people, and anything in between people, but we really
do enjoy us a good brunch. Brunch should also no longer be quarantined to Sundays
in our opinion, either. Friday, Saturday, any given Monday holiday, this wonderful
hybrid meal should be enjoyed as often as possible, particularly as it offers the
loop hole on the "you shouldn't drink before noon" rule.
If you find yourself wanting to break out of the standard brunch cocktail rut, an
Aperol Spritz may be just what you need. In my "real job" I am part of a task force
surrounding new initiatives and have counterparts based in both London and Tokyo
that I collaborate with on the regular for these projects. It makes the "what did
you do this past weekend?" question much more interesting to say the least. As a
matter of fact, this post was inspired by said London colleague who was off on a
long weekend to Tuscany with her boyfriend recently. While I heart New England and
all of it's rustic charm, a long weekend in, say Maine, doesn't quite have the same
ring as a weekend in the heart of food and wine country. She sent me pics of some
of the food and drinks they had while there and it reminded me of the classic Aperol
Spritz. I had had it a few times before but not recently and I almost let myself
forget how good (and easy to make) it is! Shame
on me!
For those that don't know, Aperol is an Italian apertif similar in taste but with
about half of the alcohol content of Campari. An apertif by definition is a drink
served before dinner as a means to stimulate appetites. With its' bitter orange and
rhubarb ingredients we feel the flavor profile of Aperol makes for a wonderful mixer
to balance out the sweet of something else that can be enjoyed right through the
meal as well! You don't need a lot to make a drink so a bottle will last you (i.e.
you shouldn't find yourself coming home from a long day of work and sticking a straw
in the bottle to start sucking it down, it ain't that kind of party folks).
I made myself this concoction last weekend as I was enjoying my solo brunch at home
while writing. I loosely scrambled up two eggs with local cheddar and herbs and
toasted some brioche to go with. Herbs in eggs are the easiest way to jazz up the
ordinary and is an often overlooked step when cooking at home. I usually have some
basil and rosemary at the very least on hand, but this day I had some leftover flat
leaf parsley and oregano from stock I made the day before, so I threw that in there
as well. Combined with the GOOD local cheddar it was heaven. Yes people, do
yourself a favor and understand the difference between quality, local cheddar and
the not so great stuff you get in those resealable store packages. It tastes
better, it melts better and frankly you don't need to use as much, so you can
reconcile your budget conscious left side with that if price is an issue.
Here goes the recipe, for you to make at home or tell your bartender about at your
next brunch spot.
3 parts Prosecco (Italian sparkling wine)
2 parts Aperol
1 part club soda or seltzer (I used a Mandarin seltzer with mine, lovely)
Serve over ice and garnish with a big old orange slice
Cheers!
Trish (stay tuned for Dave's big 30th birthday post this week!)
Sunday, October 7, 2012
It's Called Genever, And It's Fantastic
Never ones to be deterred by the questionable or fear the unknown, Dave and I set out to attend a Genever tasting a couple of weeks back. As always, Eno Fine Wines in Providence and the Providence Wine Academy partnered up to put on an intimate little event in a show of appreciation for their loyal patrons.
To show you how much I knew about Genever, I googled it prior to the tasting and thought I was attending a sampling of gins. Turns out I wasn't TOO far off, but certainly not close to the mark.
Genever is wildly popular and the spirit of choice in Holland and Belgium and according to the distillers who were our gracious educators that evening big on the scene in the United States prior to the prohibition. This was going to be one big lesson for us and we were ready to drink! (LEARN...I meant learn).
Representatives were on site from Bols and Diep 9 (400 and 100 year old distilleries, respectively), presenting this mysterious beverage and they informed us that Genever (pronounced ge-knee-ver), much to my chagrin, is NOT gin but a malt wine based spirit that is distilled up to three times and incorporates botanicals in the process. For the laymen when you hear the word 'malt' involved in alcohol you want to be thinking barley, wheat, rye and corn. Not necessarily in that order or even all together, but you know it's born of one or more if it's malted, whatever it is.
Both Diep 9 and Bols brought a range of young and old Genevers, and the tastes and profiles of the two could not be more different. The younger Genevers definitely reminded me of gin, as they're married with a juniper malt wine then distilled with the botanicals. I was confused at first if I should be drinking this straight or looking for a mixer of sorts, but you can do either. We tasted all of these straight and the Dutch and Belgians apparently always enjoy them that way, and when in Holland... Some were much lighter than others and Dave and I personally enjoyed the younger Genevers, specifically the Diep 9 Young Grain which was clear, clean and smooth and easily enjoyed neat or on the rocks. Of course feel free to dress it up a little with some St. Germaine or fresh fruit juice if the mood strikes you.
The Bols Aged Genever won our vote in the older category, where law states it needs to be more than 15% malt wine and aged a minimum of one year to be called 'old'. This particular one was aged 18 months in brand new charred French oak barrels. It should be noted you can only call a Genever 'young' or 'old' in Belgium and Holland and these were more reminiscent of a scotch whiskey to us, likely due to the aging in the charred barrel. I wish I could only be referred to as 'old' in Belgium and Holland, then I wouldn't feel the need to drink so much Genever to forget about my age. Anyway, I digress. Given the vast difference between the young and old, you'll want to take that into consideration depending upon your tastes and preferences.
Another fun fact about Bols is that each bottle is hand crafted from clay found only along a certain river bank in Germany (I apologize for not remembering the name of the river, at this point I had been Genever'ed). Each bottle is a little different due to the human element involved in manufacturing.
Unless you have an upcoming trip to Holland or Belgium in the mix, you won't be able to run into any store and pick this up...thankfully our friends down at Eno at Westminster Street in Providence carry Genever and will be more than happy to undo the confusion we've likely just caused you.
Until next time,
Dave and Trish
To show you how much I knew about Genever, I googled it prior to the tasting and thought I was attending a sampling of gins. Turns out I wasn't TOO far off, but certainly not close to the mark.
Genever is wildly popular and the spirit of choice in Holland and Belgium and according to the distillers who were our gracious educators that evening big on the scene in the United States prior to the prohibition. This was going to be one big lesson for us and we were ready to drink! (LEARN...I meant learn).
Representatives were on site from Bols and Diep 9 (400 and 100 year old distilleries, respectively), presenting this mysterious beverage and they informed us that Genever (pronounced ge-knee-ver), much to my chagrin, is NOT gin but a malt wine based spirit that is distilled up to three times and incorporates botanicals in the process. For the laymen when you hear the word 'malt' involved in alcohol you want to be thinking barley, wheat, rye and corn. Not necessarily in that order or even all together, but you know it's born of one or more if it's malted, whatever it is.
Both Diep 9 and Bols brought a range of young and old Genevers, and the tastes and profiles of the two could not be more different. The younger Genevers definitely reminded me of gin, as they're married with a juniper malt wine then distilled with the botanicals. I was confused at first if I should be drinking this straight or looking for a mixer of sorts, but you can do either. We tasted all of these straight and the Dutch and Belgians apparently always enjoy them that way, and when in Holland... Some were much lighter than others and Dave and I personally enjoyed the younger Genevers, specifically the Diep 9 Young Grain which was clear, clean and smooth and easily enjoyed neat or on the rocks. Of course feel free to dress it up a little with some St. Germaine or fresh fruit juice if the mood strikes you.
The Bols Aged Genever won our vote in the older category, where law states it needs to be more than 15% malt wine and aged a minimum of one year to be called 'old'. This particular one was aged 18 months in brand new charred French oak barrels. It should be noted you can only call a Genever 'young' or 'old' in Belgium and Holland and these were more reminiscent of a scotch whiskey to us, likely due to the aging in the charred barrel. I wish I could only be referred to as 'old' in Belgium and Holland, then I wouldn't feel the need to drink so much Genever to forget about my age. Anyway, I digress. Given the vast difference between the young and old, you'll want to take that into consideration depending upon your tastes and preferences.
Another fun fact about Bols is that each bottle is hand crafted from clay found only along a certain river bank in Germany (I apologize for not remembering the name of the river, at this point I had been Genever'ed). Each bottle is a little different due to the human element involved in manufacturing.
Unless you have an upcoming trip to Holland or Belgium in the mix, you won't be able to run into any store and pick this up...thankfully our friends down at Eno at Westminster Street in Providence carry Genever and will be more than happy to undo the confusion we've likely just caused you.
Until next time,
Dave and Trish
Saturday, October 6, 2012
Pork, It's What's For Lunch...and Dinner...and Leftovers
On Monday mornings, I often regale my coworkers with tales of my culinary excursions from the weekend, much to their pure joy I'm sure. As I am a single and live alone (hopefully there's no serial killers following Grapes With Dinner) I'm usually bringing leftovers in for anyone who wants to sample. This particular Monday I decided that samples wouldn't cut it and that the perfect cure for a case of the Mondays was some pulled pork sandwiches for the house.
Slow cooker pulled pork is one of the best things going if you ask me...nothing like set it and forget it cooking that brings accolades of your mastery to boost one's ego. My BFF, Jeanne, makes a honey of pulled pork in the slow cooker and I use a little of what she's done over the years along with my own touches, recipe below.
What to pair it with you ask? Good question...pulled pork is tricky. I say throw caution to the wind, go forward without abandon and drink whatever the hell you want (I mean that's what you should really always do anyway, life is short my friends). I would choose a bourbon or a beer myself, but if you're stuck on wine go with a light crisp white that's maybe a little effervescent like a Vino Verdhe (Portugese and delicious while extremely easy on the wallet, it's a no lose situation).
Pulled Pork:
Slow cooker pulled pork is one of the best things going if you ask me...nothing like set it and forget it cooking that brings accolades of your mastery to boost one's ego. My BFF, Jeanne, makes a honey of pulled pork in the slow cooker and I use a little of what she's done over the years along with my own touches, recipe below.
What to pair it with you ask? Good question...pulled pork is tricky. I say throw caution to the wind, go forward without abandon and drink whatever the hell you want (I mean that's what you should really always do anyway, life is short my friends). I would choose a bourbon or a beer myself, but if you're stuck on wine go with a light crisp white that's maybe a little effervescent like a Vino Verdhe (Portugese and delicious while extremely easy on the wallet, it's a no lose situation).
Pulled Pork:
5 lb boneless pork butt shoulder
1 and 1/2 tsp paprika
2 tsp black pepper
1 tsp cayenne pepper
1 tsp dried thyme
1 tsp garlic powder
1/2 tsp salt
1/2 cup apple cider vinegar
1/4 cup water
A couple big scoops of brown sugar
Some ketchup...sometimes I use this, sometimes I don't depending on if I have enough...just squeeze in a few healthy globs of it
Cook it all on low in the slow cooker for 8 hours or on high for 4 and fork shred it when it's done. Serve this on soft rolls (potato or hamburger is my usual go to bun)
Amongst the above mentioned coworkers is one individual that recently took a disappointing spin on the dance floor with some country pork ribs. Although this particular colleague likes to poke fun at my lack of participation in the world of technology (I'm a bit of a purist) being the nice person I am I wanted to include Dave's tried and true recipe for ribs in this post.
Enjoy Brian!
Dave's Slow Roasted Country Ribs:
2 racks of pork baby back ribs
Kosher or Sea Salt
Black Pepper
Paprika
Chili Powder
Mix about a teaspoon of each spice with a teaspoon of salt in a bowl. Rub the ribs all over with this mixture and let sit while you preheat your oven to 250. Place the ribs on a lightly oiled sheet pan and roast in the oven for about 2 hours, you want them to be tender but not totally falling off the bone. From there remove the ribs and brush with bbq sauce. Turn the broiler on in your oven and broil the ribs until they caramelize a little and the sauce sticks to them a bit. Watch these carefully as you don't want to burn them, just give them a little color and that won't take long.
Before serving, brush again with BBQ sauce and then serve more sauce (and lots of napkins) on the side.
There are so many BBQ sauce recipes out there but here’s an old one that we like very much and is so easy your pet pot belly pig could make it (assuming he wouldn't know what it would be used for).
½ cup cider vinegar
½ cup Worcestershire sauce
1 tbsp dry mustard
1 tbsp dark brown sugar
1 tbsp paprika
Tsp salt
Tsp: cayenne
1 cup ketchup
2 minced garlic cloves
½ a medium onion minced
Sautee onion and garlic in oil for a few minutes. Stir the remaining ingredients into the pot and cook on medium low heat for 15 minutes until thickened nicely. As Porky Pig would say himself, that's all folks!
Again...beer, bourbon, wine...your grandmother's brandy...whatever knocks your socks off, it's a free for all.
Sending our regards to Porky,
Dave and Trish
Subscribe to:
Posts (Atom)